Remember these green velvet cupcakes I posted yesterday? They were mini cupcakes and I made 24 of them. The other half of the cake I made as a nine inch round cake so I could use it for cake pops. The recipe I used makes more than a normal batch so my round cake was huge! I ended up making about 40 cake pops from it. With the cake part of the cake pop being green, I had to go with the theme and make St. Patty's cake pops!
Background
Showing posts with label red velvet. Show all posts
Showing posts with label red velvet. Show all posts
Thursday, March 17, 2011
Wednesday, March 16, 2011
Green Velvet Cupcakes
What better way to celebrate St Patrick's Day than with green cake?!! How do you make green cake, you ask? Easy. Make red velvet cake, but add green food coloring instead of red food coloring. Or if you are not a red velvet fan, you might be able to make white cake and add green frosting, but I've never tried it.
Hope you all have a great St. Patty's Day tomorrow. And don't forget to wear green!
Hope you all have a great St. Patty's Day tomorrow. And don't forget to wear green!
Saturday, January 22, 2011
Red Velvet Whoopie Pies
Whoopie pies are the new cupcakes! What's a whoopie pie, you ask? It's two cakey cookies with frosting in between them, kind of like a moon pie. They are yummy, easy to pop into a lunch bag, and pretty easy to make. These would be perfect for a Valentine's day treat!
Red Velvet Whoopie Pies
Source: Bakerella
Printable Recipe
Ingredients:
Cookies:
1 box German Chocolate cake mix
1/2 cup butter, softened
2 eggs
1 (1 ounce) red food color
1 tablespoon unsweetened baking cocoa
Cream Cheese Filling:
1/4 cup butter, softened
4 ounces cream cheese, softened
1/2 teaspoon vanilla
2 cups powdered sugar
Directions:
Heat oven to 350 degrees. Spray cookie sheets generously with cooking spray (or use parchment paper).
In medium bowl, beat all cookie ingredients with electric mixer on medium speed until blended. Onto cookie sheet, drop batter by rounded tablespoons about 2 inches apart.
Bake 11 to 13 minutes or until set. Cool 2 minutes before removing to cooling rack; cool completely.
In medium bowl, beat butter, the cream cheese and vanilla with electric mixer until blended. Gradually, add powdered sugar, 1 cup at a time, beating on low speed until smooth. For each sandwich cookie, spread 1 generous tablespoon of filling on bottom of 1 cookie. Top with second cookie, bottom side down; gently press together. Store covered in refrigerator.
Amy's Notes:
The last (and only) time I made whoopie pies, they were quite....fluffy. This time I sprayed a little non-stick spray on the back of a spoon and pressed down the batter before putting them into the oven. They baked out very nicely into a good consistent shape, thanks to my cookie scoop. I also used a piping bag to dispense the frosting evenly, but you definitely could just use a knife to spread it. I think these are perfect for Valentine's day--I've seen mixes being sold in stores! And you could even cut them into heart shapes!
Thursday, January 6, 2011
Three Cupcakes for the New Year!
It's a new year!!! Thank God. Good riddance 2010, welcome 2011, full of possibilities and hope! I also just turned 27 at the end of December. I think about where I thought my life would be when I was 27 and this is not it. I am unemployed (as is my husband), I am living in my in-laws attic, and besides our cars and the objects in our rented storage unit, I have little to my name. Despite how depressing these things can be, I have hope for better things and happiness to come in this new year.
One of the beneficial things of the past year has been my new found baking obsession. It is a coping mechanism, a creative outlet, and a happy place for me to be when things aren't going my way. I've found I love making cupcakes! Cupcakes bring a smile to my face as well as to the faces of those who eat them. My husband and I were recently visiting my family is Washington state and because we don't live close to them, I wanted to make a few cupcakes for them to enjoy while I was home. So I made cupcakes to end 2010 and to begin 2011.
First was a new red velvet cupcake recipe. It turned out to be a great recipe. And because of that, I have to keep the recipe to myself. Sorry friends, a baker has to keep some secrets to herself sometimes! I made 28 of these cupcakes and my brother at 15 of them himself, all in about 30 hours. I guess that meant he liked them!
Next, for New Years Eve, my good friend and I made chocolate cupcakes, half with peanut butter frosting and half with espresso frosting. The peanut butter frosting recipe is already posted here: Peanut Butter Cup Cupcakes and sadly, the espresso frosting wasn't as good as I had hoped. So the search is on for a good coffee/espresso frosting recipe!
So Happy New Year to each one of you! May your year be filled with joy, love and lots of cupcakes!
One of the beneficial things of the past year has been my new found baking obsession. It is a coping mechanism, a creative outlet, and a happy place for me to be when things aren't going my way. I've found I love making cupcakes! Cupcakes bring a smile to my face as well as to the faces of those who eat them. My husband and I were recently visiting my family is Washington state and because we don't live close to them, I wanted to make a few cupcakes for them to enjoy while I was home. So I made cupcakes to end 2010 and to begin 2011.
First was a new red velvet cupcake recipe. It turned out to be a great recipe. And because of that, I have to keep the recipe to myself. Sorry friends, a baker has to keep some secrets to herself sometimes! I made 28 of these cupcakes and my brother at 15 of them himself, all in about 30 hours. I guess that meant he liked them!
 |
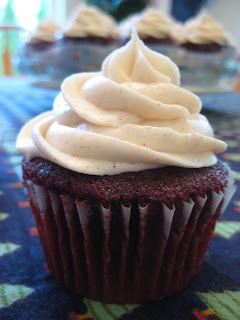
| Red velvet cupcakes with cinnamon frosting |
Next, for New Years Eve, my good friend and I made chocolate cupcakes, half with peanut butter frosting and half with espresso frosting. The peanut butter frosting recipe is already posted here: Peanut Butter Cup Cupcakes and sadly, the espresso frosting wasn't as good as I had hoped. So the search is on for a good coffee/espresso frosting recipe!
 |
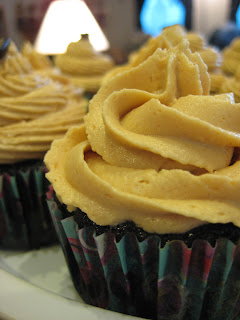
| Chocolate cupcake with peanut butter frosting |
 |
| Chocolate cupcake with espresso frosting |
So Happy New Year to each one of you! May your year be filled with joy, love and lots of cupcakes!
Labels:
baking,
cupcakes,
personal,
red velvet
Sunday, September 19, 2010
Red Velvet Cupcakes
Tomorrow is my husband's birthday. He decided after much contemplation that he wanted red velvet cake for his birthday. I had never made red velvet cake before now. Even from a box. So I was a little nervous to try it. And I didn't want a repeat of my husband's graduation cupcakes, which I had to make two batches of because the first batch I made was a complete dud. I printed off four different red velvet recipes to compare and figure out which one I wanted to use. I ended up going with Bakerella's recipe because she hasn't led me wrong yet!
Red Velvet Cupcakes
Source: Bakerella.com
Ingredients:
2 1/2 cups all purpose flour
2 cups sugar
1 tablespoon cocoa
1 teaspoon salt
1 teaspoon baking soda
2 eggs
1 cup oil (or 1 1/2 cups for regular cake)
1 cup buttermilk
1 tablespoon vinegar
1 teaspoon vanilla
2 oz. red food coloring
Directions:
Preheat oven to 350 degrees and fill cupcake pans with liners.
Lightly stir eggs in a medium bowl with a wire whisk. Add remaining liquid ingredients and stir together with whisk until blended. Set aside.
Place all the dry ingredients in mixing bowl and stir together well with wire whisk.
Add wet ingredients to the dry ingredients and mix on medium-high for about one minute or until completely combined.
Pour or spoon into cupcake pans. Drop pans on counter a few times to release any air bubbles.
Bake about 14-17 or until toothpick inserted comes out clean.
After about ten minutes, remove from pans and cool completely on wire rack. You can also cover with plastic wrap while the cakes cool.
Frost as desired.
Amy's Notes:
If you don't have buttermilk (I never do) you can substitute 1 cup milk plus one teaspoon vinegar or lemon juice and let sit 5 minutes. I almost always use a measuring cup to scoop out my batter for cupcakes. This time, I used the 1/4 cup to scoop it out and it was the perfect amount. I made a dozen mini cupcakes and the rest as regular cupcakes, which made 21 cupcakes. I thought these turned out really good. They were light and airy and had a good flavor to them. I used cream cheese buttercream frosting to frost these and didn't have enough to frost them all, so next time, I need a little extra frosting.
 |
| Pretty even before they were frosted |
 |
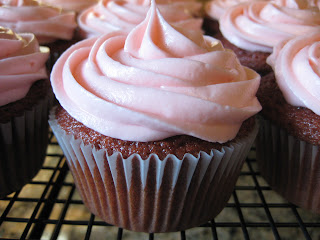
| My husband told me I could pick the icing color, hence the pink frosting! |
 |
| Yummmm |
 |
| I ran low on icing but love how these mini cupcakes turned out! |
Subscribe to:
Posts (Atom)


