Background

Sunday, August 4, 2013

LilBitOfThat Etsy Shop Open!

I just opened my Etsy shop!  Come and check it out, buy a bow or two for your little girl and help me get it up and running.

Here's my Etsy shop: http://www.etsy.com/shop/LilBitOfThat


There's some very simple hair bows that are approximately 4 inches each.  Here are a few:


And you've probably seen these adorable dinosaur hoodies on Pinterest: http://diyingtobedomestic.wordpress.com/2011/09/23/dinosaur-hoodie/

I decided to make one for my girl and found some extra hoodies.  There's limited sizes right now.  They are really adorable on!


Hope to see you all at my Etsy shop soon! 


Pin It!

Sunday, June 23, 2013

Mini Black Raspberry Cobblers

We have a huge and I do mean HUGE black raspberry patch in our backyard.  It's really one of the only good things about our yard from it's previous owners.  I don't mean to sound harsh, but most people don't plant four plants within a foot cube space in the middle of the grass.  It just doesn't work well.  And it's ugly.  We've pulled a ton of the crazy plant lady's plants out and have even thought about tearing out the berry patch because like everything else, it's just there in the middle of the grass. 


This is the second summer we've been in our house and though we have fewer berries this year than last summer, they taste so much better than I remember. We had a colder spring than normal and the berries ripened much later than last year so today was the first day of berry picking this summer. I picked 3-4 cups of berries and decided I would make The Pioneer Woman's berry cobbler with some of them.  It's a bit of an unconventional cobbler recipe but so delicious. 


Here's where you can get the recipe: http://thepioneerwoman.com/cooking/2007/08/the_great_cobbl/

Instead of one large cobbler, I made them into 24 mini (miniature cupcakes size) cobblers and 4 somewhat mini cobblers (regular cupcake size because I ran out of room). 


I added about five berries to each cobbler and a small handful to the regular cupcake size cobblers.  I sprinkled sugar on top of all of them with a spoon and baked at 350 for about 18-23 minutes. 


You can use frozen berries, but wow, the fresh ones are so much better!


These will NOT last long in our house because they are so dang good.  Good thing we have our own berry source!  Enjoy!


Pin It!

Friday, June 14, 2013

Pink Champagne Cupcakes

Hello Long Lost Blogger World,

Wow, do I stink at blogging or what.  Obviously I have much to improve upon.  Now to the important things: cupcakes. 

Pink cupcakes!


So pretty and delicious.

My mom's birthday was in May.  She moved across the country last summer and now lives a mere 10 minutes away from me.  It's epic.  And pretty awesome that we get to see her multiple times a week now instead of just a couple times a year.  I was excited to spend my mom's birthday with her this year.  My brother (who also recently moved across the country and now lives in town) and I made a big combined Mother's Day/Mom's birthday dinner to celebrate the two special days which are always just a couple days apart.  My brother grilled some steaks and veggie kabobs, plus we had salad and pineapple.  And we ended the evening with these pink champagne cupcakes.  They were pretty AND delicious.  It turned out to be a pretty good celebration. 

Here's the recipe for the cupcakes:

Pink Champagne Cupcakes
http://reneequeen.blogspot.com/2012/01/pink-champagne-cupcakes.html

1 box white cake mix
3 egg whites
1 1/4 cup pink champagne
1/3 cup oil
3 or 4 drops red food coloring
 
Mix together and bake according to the directions on the box.
 
It's true, I cheated a little and went with an easy semi-homemade recipe.  But I've got a toddler and need all the help I can get, so give me a break.


The frosting was a strawberry pink champagne frosting and oh-so-good.  Here's that recipe:
 
Strawberry Pink Champagne Frosting
 
3 1/4 c. confectioners sugar
1 c butter, softened
3 T pink champagne
1/4-1/2 tsp. strawberry extract (to taste)
1/4 tsp. pink food coloring
 
Beat the butter for the icing until it’s creamy.
On low speed, use your mixer to slowly add the sifted confectioners’ sugar until well blended. Add the champagne and strawberry extract.
Switch your mixer to high and blend for 3 or 4 minutes. Fill a pastry bag with your icing and pipe onto cupcakes.
 
I had to alter this recipe for my cupcakes because I could not find strawberry extract anywhere.  I had a package (probably about 8-12 ounces) of frozen strawberries in my freezer I decided to use.  I puréed them and added them to the frosting instead of using the extract.  Because of the extra liquid I then had to add quite a bit more sugar to thicken the frosting up.  I probably used more like 5 or 6 cups total. 
 
Enjoy!


Pin It!

Tuesday, April 24, 2012

Cookies and Cream Cupcakes

These are the cupcakes I made for the humans at Luna's first birthday party.  Not only did we need cupcakes for the wieners, but also for the humans.  I decided on cookies and cream because it was something I hadn't tried before.  I was pleased with how they turned out.  My only mistake was I didn't crush the Oreos small enough for the frosting so I kept getting larger pieces of Oreo clogging my piping tip. Here's the recipes I used.  Enjoy!

Cookies and Cream Cupcakes
(Adapted from: Cupcakes From The Cake Mix Doctor)
1 package plain white cake mix
1 cup sour cream
1/2 cup vegetable oil
3 eggs
1 t. vanilla
18 Oreos
Preheat oven to 350.  Line 24 cupcake cups with liners and set aside.
Place the Oreos in a large Ziploc bag and crush them by rolling over them with a rolling pin.  Set crumbs aside.
Place the cake mix, sour cream, oil, eggs and vanilla in a large mixing bowl.  Blend with an electric mixer until well incorporated.  Add crushed Oreos just until incorporated. 
Fill cupcake cups with liners 2/3 of the way full. 
Bake until they are lightly golden, about 18-20 mins. 

Cookies and Cream Frosting
(Source: Big Book of Cupcakes)

1/2 cup butter, softened
1 16 oz package powdered sugar
1/3 cup whipping cream
1/8 t. salt
2 tsp vanilla extract
15 Oreo cookies, finely crushed

Beat butter at medium speed with an electric mixer until creamy.

Gradually add powdered sugar, alternately with cream, beating at low speed until blended.  Add salt and vanilla, beating until blended.  Stir in crushed cookies until combined.  Beat at high speed for 2 minutes or until creamy.  Makes 4 cups. 


Pin It!

Sunday, April 8, 2012

Luna's First Birthday Party

Several months ago, I saw a recipe for a dog cake (as in a cake for dogs)  and I've been wanting to make it ever since so I decided a dog birthday party was in order for our Luna's first birthday. Have you seen our Luna? Here she was as a puppy:

Here she is now:


The first thing we needed for a wiener dog party was wiener food for the dogs:

Next, we needed wiener food for the humans. We enjoyed hot dogs, little smokies, and smoked sausage.


A party isn't complete without cake! We had dog cupcakes for the wieners and cookies and cream cupcakes for the humans.


The dog cupcakes turned out awesome and were a lot of fun to make. I gave one to Luna to try the day before the party. She devoured it in 30 seconds and them spent 5 minutes licking her bowl. I would definitely recommend them.


Carrot Peanut Butter Dog Cake
http://andeverythingsweet.blogspot.com/2010/12/charlies-1st-birthday.html

1 cup white flour
1 top baking soda
1/4 cup peanut butter
1/4 cup vegetable oil
1 cup shredded carrots
1 tsp vanilla
1/3 cup honey
1 egg
Mix flour and baking soda together and then add all other ingredients.
Bake at 350 for 30-40 minutes.
Frost with wiped non-fat cream cheese.
I doubled the recipe and made cupcakes out of the batter which made about 13 cupcakes. I baked them for about 20-25 mins. I only had enough whipped cream cheese for 9 of them with one package of cream cheese.
Here are the wieners eating their cupcakes:
Luna

Noodles

Axle

Luna helped Axle eat his cupcake

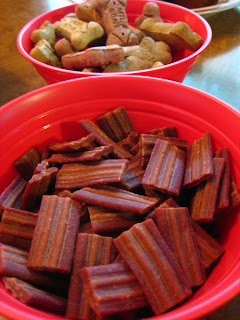
And of course, we had party treats for the wieners:


Next up, cookies and cream cupcakes!

Pin It!

Wednesday, January 25, 2012

Dr. Seuss Cake Pops

Our nephew turned one in November and had a Dr. Seuss themed birthday party, which included Dr Seuss cake pops that I made.  These were by far the most involved cake pops I've made.  As I was eight months pregnant when I made them, I started the process a week before the party so I could do a little each day and not wear myself out.  The first thing I did was make the cake (out of a box for ease), mix in the frosting, and shape the pops into the necessary shapes.  My next step was to make fondant, something I had never done before.  I used a basic marshmallow fondant recipe, made a massive mess, and ended up with successful fondant! 


I used a small circle cookie cutter to cut the fondant for the front of my 'Thing 1' and 'Thing 2' cake pops. 


I bought a tube of blue frosting (which was easier than making it) and squeezed it into my own piping bag.  I used a tip I had on hand to make the blue hair for 'Thing 1' and 'Thing 2'


Next I made the ham from 'Green Eggs and Ham'.  The white is a small fondant circle and the black is frosting I drew on with a very small tip and piping bag.  Boy, did my hand hurt from drawing those tiny lines on!


Last was the hat from 'Cat in the Hat'.  I thought this cake pop would be the simplest to make but it proved to be the most challenging.  The white disk on the bottom is fondant cut with a cookie cutter.  The red stripes are a fruit roll up.  Ha!  I tried many things here for the stripes but nothing worked very well and looked messy.  The fruit roll up worked great and was pretty quick to do, though it wasn't the greatest tasting thing. 


I think made three or four trips to Micheal's and Hobby Lobby for these pops.  I bought several items as back up items in case some of my ideas didn't work and ended up being able to return several of them.  These cake pops ended up being very labor intensive but where also a lot of fun to make!  I will say, the next time I make cake pops that take this much time, it will be for my own kid!!


The finished product at the birthday party!


Pin It!