Sunday, September 26, 2010

Black Bean and Corn Salsa

The year after my freshman year of college I did a volunteer program called Mission Year.  For 11 months, I lived in West Philadelphia, spent four days a week volunteering in my community, attended the neighborhood church, invested in my neighbors, and lived intentionally with four other girls.  It was one of the most challenging years of my life.  And also the most life changing year of my life.  Most of what I learned during that year would have been much easier to ignore--things about myself, poverty and racism, to name a few.  But a nine year old talking about who in their class they want to have sex with, or a third grader who can't read words like 'cat' and 'dog', or discussions over lunch about who got shot down the street are hard to forget. 

A major part of my year involved learning to invest in my teammates.  My four teammates and I became very close during the year.  Although I don't talk to all of them very often and only see them about once a year, I still consider them to be close friends.  I experienced something with the four of them that most of the time I can't descibe to anyone else.  I think part of why we became so close over the year, besides living in a very small house and all sharing one tiny bathroom, was that we ate dinner together six days a week.  The five of us took turns cooking dinner once a week.  And it was a huge challenge for me.  I was 19 when I arrived in Philly.  I had one year of college under my belt but never had to cook for myself before.  Growing up, I usually had to cook dinner for my family once a week but that consisted of things like tuna helper, hot dogs or grilled cheese.  Unfortunately, my cooking during Mission Year was not too different. 

Thankfully, my teammates offered me a lot of grace while I stumbled through learning how to cook for five people.  And they never complained about how many times I 'cooked' hot dogs for dinner.  I learned a ton from seeing each of them cook throughout the year.  I learned that cooking can be very stressful sometimes.  That when you try new things, they don't always work out and that's just part of the learning process.  That a meal doesn't have to be picture perfect.  Much of what I know about cooking, I've learned from the people I've lived with from Mission Year and the years after. 

At the end of our year together, we decided to put together a cookbook of the recipes we made during the year.  I've used it quite a bit in the years since Mission Year.  It's a lot of fun to look through since we wrote notes about each recipe which are funny to reread.  I am very nostalgic about food.  For instance, when I eat something it reminds me about when I first ate it or who I got the recipe from.  When I make recipes from this cookbook I always think about those crazy months I spent in Philadelphia.

Below is one of the recipes from our 'Glitter Girls Cookbook'.  We called ourselves the 'Glitter Girls' because the walls of our house were covered in glitter.  The guy who did maintenance for our landlord covered the walls of the house in that horrible popcorn stuff that goes on ceilings and then threw glitter (like the silver glitter you used in elementary school for craft projects) up on the wall while the paint was drying.  It was horrible and was just one of the many quirks of our house.

I hope to include several more recipes from this cookbook on this blog as well as some of my adventures in Philadelphia.

The cover of our cookbook was a photocopy of our guest placemat.
We had our dinner guests sign and date the placemat.
The coveted hot dog recipe.

Black Bean and Corn Salsa
Source: Glitter Girls Cookbook
Printable Recipe Here
Ingredients:
1 can black beans
1 can corn
2 or 3 green, red or yellow peppers
1 small bunch green onions
1/2 white onion
2 or 3 tomatoes
1/2 bunch cilantro
1/4 cup lime juice
1 teaspoon cumin
1 teaspoon garlic
salt, to taste

Directions:
Empty beans and corn into a large bowl.  Chop up peppers, green onions, white onion, tomatoes and cilantro.  Add lime juice and spices.  Let sit in fridge for a few hours for the flavors to mingle.  Serve on chips or over lettuce as a salad. 

Amy's Notes:
I love this stuff.  I hadn't made it in almost two years so it was long overdue to make!  We ate this salsa as dinner because it was so good!  I've never done it but I would like to try adding avacado to this next time. 

All mixed together and marinate in the fridge for a few hours.

Seriously.  So good.
Yum

Wednesday, September 22, 2010

Pumpkin Chocolate Chip Mini Muffins

Is it cake, or muffins, or cookies?  I'm not really sure, but I'm going to call them muffins.  The original recipe is for cookies, but I put them in in mini muffin tins because they seem more cakey than cookie-y to me.  Plus, I am always thinking "I wonder if I can make that in a muffin tin"--and that's exactly what I did with this recipe. 

Pumpkin Chocolate Chip Mini Muffins (Or Cookies)
1 box spice cake mix
1 small can pumpkin (15oz)
1 12 oz bag of chocolate chips

Directions:
Mix pumpkin and cake mix together.  (You don't need oil or eggs, just the dry mix.)
Add chocolate chips and mix together well.
Spray cookie sheet or mini-muffin tins with non-stick cooking spray and scoop mix onto cookie sheet or into mini-muffin tins.
Bake at 350 degrees for 10-12 minutes. 

Amy's Notes:
It's been in the 90's here since about May, with a few days in the 80's thrown in.  Growing up in the Pacific Northwest, I am craving cooler days, sweaters, pumpkin spiced lattes, and pretty much anything 'fall' related.  These muffins are my hot weather protest.  I have been wanting to make these for several weeks now, but have not been able to find pumpkin anywhere.  Thankfully, one of my co-workers knew I was looking for it and told me where to find it today.  (Yay Rachelle!) I stopped on my way home from work and made these a few hours later.  I couldn't wait any longer to try them.  Delicious!  A super easy recipe, for a fast fall baked treat!

Start with pumpkin.
Add cake mix.
Stir it all together
Add some chocolate chips
Stir it all together again.
Scoop it up. 
Bake it.  Let cool.
Eat. 
Oh my gosh.  I love pumpkin.

Monday, September 20, 2010

Two Pioneer Woman Meals

Do you know The Pioneer Woman?  If you don't, you should get to know her here or buy her cookbook here.  I don't have the cookbook yet, but it is on my list of cookbooks to buy sometime soon.  I'm hoping to find one cheap on ebay!  You can find both of these recipes on her website. 

Tequila-Lime Chicken
Source: The Pioneer Woman

Ingredients:
3 whole limes, juiced
5 cloves garlic, peeled
1 whole jalapeno, sliced
1 teaspoon salt
1/2 cup cilantro
1/2 cup tequila
5 tablespoons olive oil
4 whole boneless, skinless chicken breasts
1 cup monterey jack cheese, grated

Optional:
Pico de gallo
Refried pinto or black beans
Mexican rice
Sour cream
Avocado slices
Flour tortillas

Directions:
Combine lime juice, garlic gloves, sliced jalepenos, salt, cilantro, and tequila in a food processor or blender.  Pulse until combined.  Turn on the blender/food processor and drizzle in the olive oil until it's all combined.
Slightly flatten chicken breasts with a mallet or the bottom of a heavy skillet.  Place in a plastic bag and pour in marinade.  Seal bag and marinate for several hours or (preferably) overnight.
When ready to cook, remove chicken from bag and place on the grill.  Cook until completely done.  Toward the end of cooking, top chicken breasts with grated monterey jack and allow to melt.  (You can also top chicken with cheese and melt under the broiler.)
Serve topped with pico de gallo or salsa, alongside refried black beans, mexican rice, sour cream, avocado slices, fresh flour tortillas...and whatever other garnishes make you smile.

Amy's Notes:
Have you ever made a recipe and halfway through realize you don't have what you need?  I am sure it happens to everyone at some point and it happened to me while I made this recipe.  I had my chicken marinated and ready to cook when I realized you are supposed to grill this recipe.  And sadly, we had to get rid of our grill since our apartment doesn't allow them.  It's not a huge deal, I figured, I can just cook it on the stove.  But it just wasn't the same.  Plus, I got all thrown off by the lack of grill issue and forgot to top it with cheese at the end.  It was still pretty decent, although it would have been better grilled and with cheese on top.  I will have to make it again to redeem myself. 

I put my chicken in my ziplock bag and it fell out the bottom all over the floor.  That is what happens when you buy cheap ziplock bags.  I rinsed the chicken off and put it in a different container... : )


Tequila-Lime Chicken over rice.

Chicken Spaghetti
Source: The Pioneer Woman

Ingredients:
2 cups cooked chicken
3 cups dry spaghetti, broken into two inch pieces
2 cans cream of mushroom soup
2 cups grated sharp cheddar cheese
1/4 cup finely diced green pepper
1/4 cup finely diced onion
1 jar (4 ounce) diced pimentos, drained
2 cups reserved chicken broth from pot
1 teaspoon Lawry's seasoned salt
1/3-1/4 teaspoon cayenne pepper
salt and pepper, to taste
1 cup additional grated sharp cheddar cheese

Directions:
Cook 1 cup up fryer and pick out the meat to make two cups.  Cook spaghetti in same chicken broth until al dente.  Do not overcook.  When spaghetti is cooked, combine with remaining ingredients except 1 cup additional sharp cheddar.

Place mixture in casserole pan and top with remaining sharp cheddar.  Cover and freeze up to six months, cover and refrigerate up to two days, or bake immediately: 350 degrees for 45 minutes until bubbly, (if the cheese on top starts to get too cooked, cover with foil).

Amy's Notes:
I didn't use a fryer chicken and used canned instead because I had it on hand.  Because I didn't cook the chicken, I didn't have the chicken broth to cook the noodles in so just cooked them in water.  I omitted the pimentos because I've never had them and am afraid to try them.  I really liked this recipe.  It was a nice change from the traditional spaghetti that gets old so quickly. 

Fresh out of the oven

Sunday, September 19, 2010

Red Velvet Cupcakes

Tomorrow is my husband's birthday.  He decided after much contemplation that he wanted red velvet cake for his birthday.  I had never made red velvet cake before now.  Even from a box.  So I was a little nervous to try it.  And I didn't want a repeat of my husband's graduation cupcakes, which I had to make two batches of because the first batch I made was a complete dud.  I printed off four different red velvet recipes to compare and figure out which one I wanted to use.  I ended up going with Bakerella's recipe because she hasn't led me wrong yet! 

Red Velvet Cupcakes
Source: Bakerella.com

Ingredients:
2 1/2 cups all purpose flour
2 cups sugar
1 tablespoon cocoa
1 teaspoon salt
1 teaspoon baking soda
2 eggs
1 cup oil (or 1 1/2 cups for regular cake)
1 cup buttermilk
1 tablespoon vinegar
1 teaspoon vanilla
2 oz. red food coloring

Directions:
Preheat oven to 350 degrees and fill cupcake pans with liners.
Lightly stir eggs in a medium bowl with a wire whisk.  Add remaining liquid ingredients and stir together with whisk until blended.  Set aside.
Place all the dry ingredients in mixing bowl and stir together well with wire whisk. 
Add wet ingredients to the dry ingredients and mix on medium-high for about one minute or until completely combined. 
Pour or spoon into cupcake pans.  Drop pans on counter a few times to release any air bubbles.
Bake about 14-17 or until toothpick inserted comes out clean.
After about ten minutes, remove from pans and cool completely on wire rack.  You can also cover with plastic wrap while the cakes cool.
Frost as desired.

Amy's Notes:
If you don't have buttermilk (I never do) you can substitute 1 cup milk plus one teaspoon vinegar or lemon juice and let sit 5 minutes.  I almost always use a measuring cup to scoop out my batter for cupcakes.  This time, I used the 1/4 cup to scoop it out and it was the perfect amount.  I made a dozen mini cupcakes and the rest as regular cupcakes, which made 21 cupcakes.  I thought these turned out really good.  They were light and airy and had a good flavor to them.  I used cream cheese buttercream frosting to frost these and didn't have enough to frost them all, so next time, I need a little extra frosting. 

  
Pretty even before they were frosted

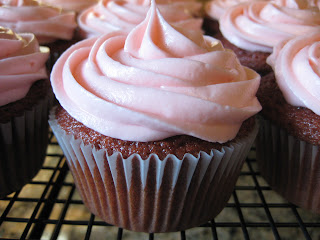
My husband told me I could pick the icing color, hence the pink frosting!

Yummmm


I ran low on icing but love how these mini cupcakes turned out!


Wednesday, September 15, 2010

Saucy Skillet Lasagna

Who doesn't love lasagna?!!  As delicious as lasagna is, it isn't the fastest dinner to make.  This recipe is a quicker take on lasagna.  It is tasty, quick and pretty easy.  The taste is pretty comparable to traditional lasagna and takes less than 30 minutes to make!

Saucy Skillet Lasagna

Ingredients:
1 Pound ground beef
1 26oz jar spaghetti sauce, with mushrooms
1 14oz can diced tomatoes, slightly drained
1 cup ricotta cheese
1 large egg, beaten
1 9oz package no-boil lasagna noodles
1 cup shredded mozzarella cheese

Directions:
Cook ground beef in a large skillet over medium-high heat, stirring frequently, until browned and crumbly, about 5 minutes; drain well.
Add half of the jarred spaghetti sauce to ground beef in the skillet and mix well.  Pour diced tomatoes evenly over the ground beef.
Combine ricotta and egg in a small bowl and mix well.  Spread evenly over tomatoes.  Top with a layer of lasagna.
Layer with remaining spaghetti sauce and remaining lasagna in the skillet.
Bring to a boil.  Reduce heat to medium-low.  Cook, covered, until lasagna is tender, about 10 minutes.  Sprinkle with mozzarella.  Cook, covered, for 2 minutes.  Serve immediately.

Amy's Notes:
I almost always use petite diced tomatoes in place of diced tomatoes based on my preference (I have a weird thing about big chunks of cooked tomatoes).  I used a whole container of ricotta cheese, mostly because I knew I wouldn't have anything else to use it for in the next few weeks, and it tasted good with a little more ricotta.  I had a large container of sauce on hand and didn't measure how much I used, just eyed it until it looked nice and saucy!  I added a small can of chopped mushrooms after the meat was browned and before I added the spaghetti sauce and tomatoes.  The only downfall for me was that I love the crunchy edges of oven baked lasagna and you don't get that with this stove top version.  I will definitely make this recipe again, but might have to still make an oven baked lasagna once in a while for those crunchy edges!

I forgot to take a picture before I began serving it up!  Woops!
My husband distracted me and my garlic bread got a bit brown.  Still tasty though.

Yummm


Saturday, September 11, 2010

I Love My...

I Love My Crock Pot! 

I am convinced that you could put just about anything into a crock pot and it would come out tasting delicious!  And I am also convinced that though crock pot meals taste delicious, they don't usually look very appealing.  My husband has told me many times that the things I cook don't always look good, but they always taste good.  And it's true.  I am blaming part of that on my love of my crock pot.  Most of the recipes I go back to time after time are crock pot recipes.  It is just so convenient to put a few ingredients into a pot and go back a couple hours later to have a delicious dish. 

I have two crock pots.  One that is a normal 4 quart size and one miniature crock pot that is meant for dips, but I actually use the smaller one more frequently!  With just my husband and I, the mini crock pot is usually all we need.  I will use the larger one for big batches of things, but if I am just making a normal dinner, I use the mini crock pot.  The only downfall is that it only has one heat setting. 

I discovered the recipe below on a blog several months ago.  It is easy and very tasty.  You can put it over rice or put it on a roll as a sandwich--both are good.  There is no way you can screw this one up!

Versatile Crock Pot Chicken

Ingredients:
1-2 pounds chicken
3/4 a bottle of barbecue sauce
1/2 cup salsa (I usually add about 1 cup)
1/4 cup brown sugar
1 small chopped onion

Directions:
Combine all ingredients in crock pot on low for 4 hours (I usually cook it all day on low) or until chicken can be shredded.  Serve over rice or on your favorite rolls.  Top with cheese if desired.


Friday, September 10, 2010

Cupcakes and Cake Pops!

I wanted to try my hand again at cake pops because I was disappointed with the first batch.  I decided to make half a batch of cake pops and the other half as mini cupcakes.  I had a white cake mix on hand that I used for the cake and then made the recipe below for the frosting.  Every time I've made this recipe it turns out well plus it's a pretty easy frosting recipe.  And I love a good cream cheese buttercream frosting!

Cream Cheese Buttercream Frosting

Ingredients:
1 (8 oz) package cream cheese, room temperature
1/2 cup (1 stick) butter, room temperature
1 (1 pound) box powdered sugar (about 3 3/4 cups)
1 teaspoon vanilla extract

Directions:
Place cream cheese and butter in bowl of an electric mixer fitted with the paddle attachment and beat until creamy, about 30 seconds.
With the mixer on low, slowly add the sugar (I usually sift it first), scraping down the sides of the bowl as necessary.
Add vanilla and increase mixer speed to medium.  Blend until frosting is fluffy, about 1 minute. 

I really enjoy decorating cupcakes!  I haven't done it too much but am getting the hang of it more and more.  And it is actually a lot simpler than it looks.  What you need is a frosting tip, decorating bag, and coupler, if necessary.  For a regular cupcake, I use a 1M Wilton tip and a 12 or 16 inch decorating bag.  Fill the decorating bag with icing.  It's easiest if you roll down the edge when scooping it in then roll the edge back up when filled. 


Hold the bag at a 90 degree angle right above the cupcake.
Pipe the icing from the outside inward
Stop pressure and pull the tip away
Begin a second smaller spiral and when done, stop pressure and pull tip away.
The result!
So pretty!
The cake pops turned out a lot better than my first batch!  The cake wasn't as gooey and I finally found a system that works well, as well as chocolate that worked well with me.  It took a little trial and error but I was pleased with the outcome.  They are far from perfect though!  I still have a lot of things I want to try with cake pops!

At first, the chocolate was too thick and dripping everywhere and the sprinkles I put on didn't look right. 
So not what I was going for...
So, I switched it up a bit.  I thinned out the chocolate a little, kept the chocolate warmer, and used chocolate sprinkles.
That's better.
And I tried rainbow sprinkles!
I like it!
I also made a few in the shapes of hearts to try something new.  I wasn't sure they would turn out but thankfully they still resembled a heart when finished!

A few more cake pop pictures:


And they tasted so much better than the first batch! 

Tuesday, September 7, 2010

Berry Cobbler Cupcakes

Oh my gosh, these are so easy!  Seriously, the pan takes longer to clean than actually making them!  Plus, they are delicious.  This recipe is originally for a cake pan (11 x 7) but I decided on my way home from work today that I was going to try making them as cupcakes.  I made them as regular cupcakes and mini cupcakes since I didn't know which would be better (I like the mini cobblers better, mostly because they are so cute!).  Beware though, the mini cupcake cobblers are so cute and tiny, it is easy to eat way too many!

Berry Cobbler Cupcakes
Source: Terry Collette

Ingredients:
1 Cup sugar + 1/4 cup additional
1 Cup flour
1 Cup milk
1/2 Cup butter, melted
2 Cups frozen berries

Directions:
Whisk together the sugar, flour and milk. Add butter and stir together. 
Pour into lightly greased cupcake tins or cake pan.  Fill each cupcake tin about 2/3 full.
Sprinkle a few berries on top of each cupcake (or batter if in cake pan).  Dust 1/4 cup of sugar over top of berries.
Bake at 350 degrees for about 25 minutes or until edges begin to brown.  (Or about 1 hour if in cake pan.)

Amy's Notes:
I wasn't sure whether to use a cupcake liner or not when I made these.  I am going to try using them next time but I might double line them and will definitely spray a little bit of cooking spray on the liners before I add the batter.  Also, I didn't use all 2 cups of berries.  I just sprinkled them until it looked like each cupcake had enough.  I used blackberries, but have been wanting to try these with raspberries, blueberries or even mixed berries.  They would all probably be good!

Forgot to take a 'before' picture, so here the oven picture.

A little spilled over but still delicious.

Mini Berry Cobbler Cupcake... yummm

Saturday, September 4, 2010

The Ugly Cupcake

Yesterday, we went to The Ugly Cupcake in Kingsport, TN.  The store itself wasn't much to brag about.  There was bulk candy along the white walls and a single counter with odds and ends behind it where the cupcakes are prepared.  There was no place to sit inside the store to eat your cupcakes.  The cute factor wasn't there that you expect to see at a cupcake shop.  Although, there was a steady line of customers the whole time we were there. 

We bought four cupcakes: red velvet, birthday cake, peanut butter cup, and orange dreamsicle.


The Red Velvet cupcake was ok. The cake didn't have very much flavor but the frosting was pretty good. Although, there was hardened white chocolate on the top of the icing, which was delicious and made the cupcake much better!


The birthday cake cupcake was pretty mediocre. It was white cake, which was a bit crumbly and dry with chocolate frosting and multicolored sprinkles. The frosting was decent, it was whipped, which isn't my favorite, and the chocolate flavor wasn't very strong.  The sprinkles were pretty much the best part!

The peanut butter cup cupcake was pretty good. The chocolate cake was very good. The peanut butter frosting didn't have a very strong peanut butter taste, which some people might like, but I would have liked a stronger peanut butter flavor for the frosting.  Plus, the Resse's cup on the top was delicious, as always. 

The orange dreamsicle cupcake was probably my favorite. The cake was light and fresh with a nice orange flavor. The icing was orange and vanilla mixed together, which made for a very nice 'dreamsicle' flavor. I would definitely get this one again!

Overall, The Ugly Cupcake was ok.  If it was the only cupcake store, I would go to it.  But because it isn't, I probably would go somewhere else or make my own cupcakes.